Blog 2017

Latest

Posted On: July 16, 2023
Posted On: June 04, 2023
Posted On: April 04, 2023
Posted On: March 28, 2023
Posted On: March 14, 2023

Subscribe

Via Email:

Archive


HAVE A SAFE LABOR DAY WEEKEND

Posted On: August 31, 2017

Make safety part of your Labor Day weekend plans

The Labor Day holiday weekend is a busy boating weekend. Patrols will be out in force looking for people who are boating while intoxicated and operating in an unsafe manner. In an effort to increase safety, Coast Guard and local officers will be working over the holiday weekend. Boaters are asked to do their part by remaining alert for other boats and swimmers, and being courteous on the water. With more boats on the water, it is even more important to pay attention when operating a vessel.

Remember: If you choose to drink alcohol, don’t operate a vessel. Alcohol consumption slows reaction time. Pay attention to the boats around you and ask your passengers to assist with this. Evasive maneuvers should be made early and deliberately. Check your vessel’s navigation lights before heading out at night, and be sure to have spare bulbs on board. Avoid overloading your boat with too many passengers, and observe day and nighttime speed limits.

Have a safe and enjoyable weekend.

0

SOME HELPFUL NEW GADGETS

Posted On: August 24, 2017

Let there be light!!

Aqualuma Spreader Light 4

Aqualuma Spreader Light 4

Well known in the field of LED underwater lights, Australian manufacturer Aqualuma also manufactures some rather stylish spreader lights. Ideal for use on most boats, the Spreader Light 4 is available with either a flush- or bracket-mount option. The bright white light, rated at 8,000 kelvins, is perfect for illuminating decks and working areas on boats of all sizes. A miserly current draw of less than 1.5 amps means that the lights can be left on for extended periods without fear of draining the battery. The body is constructed of aluminum protected by a very neat powder-coated finish to prevent corrosion. The lens is a scratch-resistant polymer that's super tough and durable

Need Backup?

Simrad HH36 VHF

Simrad HH36 Handheld VHF Radio

For the smaller boat, or as a backup to the main unit, having a portable VHF on board is a great idea.

The HH36 from Simrad is a fully functioning portable radio that's waterproof, so it's ideal for center-consoles and open boats that tend to get wet. It floats, too, so it won't sink to the bottom if you drop it in the drink. It's DSC compatible; program in your boat's MMSI number, and even if you can't speak, you can activate the distress button on the front to summon help in an emergency. A large backlit display shows the channel you've selected. Best of all, you can display your track and position utilizing the built-in GPS. The HH36 is switchable between outputs of one and five watts, and Simrad claims a battery life of 11 hours on low setting, so you should be able to get out and back on a daylong excursion without recharging!

Feeling a little dry?

Docktail Bar

When you return to the dock after a hard day's boating, there's nothing quite so nice as a refreshing drink while the sun sinks in the west. The trouble is that many boats are simply not geared up with some convenient place from which to serve drinks. The Docktail Bar is a simple but clever device that satisfies the problem of where to place and secure adult beverages while you serve your guests. Made from white Starboard, the same stuff used to fashion everything from fish-filleting stations to transom steps, the Docktail Bar is designed to be slid into a convenient rod holder, which holds it in place while you mix and serve the drinks. It's available in several different configurations and mounting options, so there's sure to be one that fits your needs. No rod holder, no problem: Go with the suction-cup mount.

0

USING A LOOK BUCKET

Posted On: August 22, 2017

Need help seeing?

Deflecting the light, with this handy, fun plexi-bottom bucket, lets you look before you anchor.

Fun article by Don Casey

If you're boating in clear water, it can be useful to view the bottom. For example, discovering that the seabed under the boat is rock, deep weed, or scoured coral before you try to anchor can avoid a lot of pointless frustration. Unfortunately wind chop and light reflection usually obscure your sight. All that's required to see into the water is a glass panel to "flatten" the surface. A dive mask will serve, but unless you wear it and stick your head in the water, your view is soon compromised by water slopping over the short skirt and onto the top of the glass.

The better tool is a look bucket. For little money, you can make one better than most that are commercially available. All you need is a stiff plastic bucket, a disk of clear plastic, and appropriate adhesive. A five-gallon paint bucket is the usual bucket choice because it's stiff, has a sharp angle between bottom and side, and features a protective lip around the base. However, a smaller bucket (2 1/2-3 gallons) can be easier to handle. The clear plastic can be acrylic or polycarbonate and should be not less than 1/8-inch thick; thicker is better because flexing can make the bond between the bucket and the plastic fail. I use marine or structural glazing silicone for gluing the lens to the bucket, but you can also use polyurethane (3M 5200) if the lens is acrylic (but not polycarbonate). Flexible epoxy can also bond and seal the lens.

  1. Cut a disk of clear plastic to the inside diameter at the bottom of the bucket. Using a utility knife or a hot knife (better), cut out the bottom of the bucket, leaving a one-inch rim. So the buoyancy will compress rather than test the seal, some people bond the plastic outside the bucket, but this typically makes it untrustworthy as an actual bucket unless you add mechanical fasteners. I prefer setting the lens into a bed of sealant that extends up the side of the bucket to provide both tensile and sheer strength.
  2. Hold the circular lens in place and trace around the cut circle of the bucket with a sharp blade to cut the protective film. Peel away the perimeter piece, leaving the middle. To provide a better gripping surface for your adhesive, use 100-grit paper to sand the exposed plastic around the circumference of the lens, including the edge. Also, sand the mating surfaces of the bucket. For a neater job, mask the bucket wall above the level of the lens.
  3. Apply adhesive sealant liberally to the lip and side of the bucket, then set the lens in place. Weight it lightly; you want the lens to make full contact but you don't want to squeeze out all of the adhesive. The seal needs to be thick enough to absorb some flex during use.
  4. Allow the adhesive to cure fully, trim away excess sealant, and peel away the remaining film and any masking you did. Your bucket is ready for "look box" duty while still functioning as a bucket for washing or bailing. 
0

WHAT CAUSES A BOAT TO CAPSIZE

Posted On: August 15, 2017


What causes boats to capsize?

In a word, instability. Boats are inherently stable until something causes them to become unstable. And that something is weight — where it is and how much it is determines when a boat will tip over far enough to capsize or fill with water.

A capsize is defined as a boat rolling over onto its side or completely over; swamping typically means that a boat fills with water (often from capsizing) but remains floating. So to simplify, we'll use the term capsize from here on. As mentioned, boats capsize because they become unstable, but there are three main reasons for that instability: too much or unbalanced crew or equipment weight; leaking water, which also creates too much weight; and bad weather, which causes instability as a boat is rocked and filled with water.

We Hope It Floats

There is always a very real possibility of injury when passengers unintentionally go in the water with nothing to hold onto. The U.S. Coast Guard (USCG) has addressed this by requiring monohull powerboats built after 1972 under 20 feet in length to float when filled with water. This is a good thing, because without it, most of the small boats in the study would have sunk out from under the crew, leaving nothing to hang onto while waiting for rescue. The bad news is that boats larger than 20 feet that don't have built-in flotation will eventually sink if capsized, and even smaller boats with flotation can still sink if grossly overloaded. (Note: Boats up to 26 feet built to the American Boat & Yacht Council (ABYC) standards adopted by the National Marine Manufacturers Association (NMMA) also have flotation). Inboard and sterndrive boats have less rigorous basic flotation requirements than outboard-powered boats. If your boat was built before 1972, it wasn't required to — and probably won't — have flotation at all.

Which Boats Are More Likely to Capsize?

Small boats are most likely to capsize. Almost 10 percent were 8-footers, mostly dinghies, and capsizes here often didn't cause much damage. But the biggest group, according to a BoatUS study were the 15-19 footers, representing 41 percent of all capsizes. These boats were typically fishing boats, often with large, hard-to-drain cockpits, sometimes out in poor weather, and were sometimes overloaded.

The next most common group are boats in the 20-24-foot range, representing a quarter of the total; half of those were outboard-powered 22-footers. Larger boats tend to be more stable and rarely capsize, though there were several boats over 38 feet that capsized.

Why They Capsize

Nearly all capsizes can be assigned one of three causes. The most common is too much or poorly distributed weight. Small boats are much more susceptible to an extra person or two or a couple of heavy coolers aboard than larger boats. Older boats especially may have gained weight over the years as more gear is stored aboard. On boats with cockpit drains, an extra beefy friend or a second cooler might be all it takes to make the water come back in through the drains, filling the boat. While most of these under-20 foot boats are required to have flotation, they also must have a capacity plate that states how much weight and how many people can safely be aboard. Pay attention to this number, and keep in mind that the number of seats in a boat is not always an indication of the number of people it can carry safely. Exceeding the capacity limits, even in calm water, is asking for trouble; and in many states, operators can be ticketed for it. All it takes is a stiff wind, a large wake, or an unbalanced load to flip over.

The bottom line is that loading too much cargo or too many passengers in one part of the boat can affect its stability, even if the total load is within the boat's maximum capacity. Weight needs to be evenly distributed, especially in smaller boats. One other thing worth mentioning is that capsizes can also be caused by modifications that affect the stability of the boat. Even a small tuna tower can severely change the center of gravity, especially on a smaller boat.

The second major cause of capsizing is leaks. Sometimes it's as simple as forgetting to put the drain plug in; other times it's leaking fittings. Water sloshing around in the bottom of the boat affects stability and waves or a wake can cause it to flip. Tying the drain plug to your boat key is a simple way to remember the plug. On the other hand, leaking fittings that can fill the boat with water are usually out of sight, often in livewells and bait boxes. Several claims were reported when an owner installed a livewell fitting using cheap PVC pipes and valves, and at least one livewell had no shut-off valve at all with no way to stop the ingress of water once it began leaking. Any fitting that penetrates the hull needs to be closeable and should be made from stainless steel, bronze, or Marelon. One more thing the claims revealed: Some livewells are plumbed in such a way that they'll flood the boat if the valve is left open while underway.

Many older outboard-powered boats have low transom cutouts that can cause the boat to flood simply by slowing down too quickly, especially with excess weight in the stern. Newer outboard boats have a well that reduces the risk.

Some boats have cockpits that drain into the bilge (generally considered a poor design), requiring the use of a bilge pump to even stay afloat. Bilge pumps are designed to remove nuisance water only, not to keep a boat from sinking. If your boat's cockpit drains into the bilge, be aware that if the bilge pump fails, your boat can fill with water and capsize or sink.

Weather is another major cause of capsizes, sometimes in concert with overloading. Small boats are easily overwhelmed by modest waves or even wake, especially if they've got a full load and sit low in the water. A sudden squall can flip even a larger boat. Check the weather forecast before you go out, and keep a weather eye on the sky. In most areas, NOAA broadcasts continuous weather via VHF radio. If you're within range, smartphone apps can show you detailed weather maps, including radar, which can indicate approaching storms. Weather changes quickly on the water, so at the first sign of bad weather, head back to the dock. If you're caught out in a squall, have your passengers stay low near the center of the boat to maintain stability.


Based on an article in BoatUS

0

CAN I SEARCH A BOAT'S TITLE HISTORY?

Posted On: August 10, 2017


Can I search the title history for a boat I'm looking to purchase?

When you buy a used car, chances are you may have used a service such as Carfax to try to learn something about the car's history. Unfortunately, there's no comparable service for boats.

Vehicle-history services can query state databases for title history, but not every state requires titles for boats. And even if you did get the history, unlike car titles that are "branded" if a car has been totaled, very few states brand boat titles for rebuilt, sunk, or totaled boats. Also, boat dealers and insurance companies don't report warranty work or claims to a single accessible database.

If you want to learn about your boat's title in a state that has them, you can look up the agency online and ask. It's not always easy, but it may save you some hassle. A seller can show you his title (in states that have them) that will note if a boat has a current lien on it, so at least you'll know a loan will have to be paid off before title can be transferred to a new owner.

If a boat is federally documented, you can do a free search in the U.S. Coast Guard (USCG) database. You won't get much more than ownership information with that, though, unless you pay $25 for an abstract of title, which also shows liens.

0

ANCHORING YOUR SMALL BOAT

Posted On: August 08, 2017

Small Boat Anchoring

Five simple step to follow for reliable anchor sets on small boats.

Here's a short piece from Tim Murphy, BoatUS

Many boaters — whether fishing, swimming, or socializing aboard — spend their best hours anchored rather than underway. With that in mind, let's look at ways to keep your time at anchor comfortable and safe.

  1. Find A Good Spot

A good anchorage offers protection from wind and waves, swinging room, and a quality bottom. Choosing an anchorage that's protected from waves is the best insurance against dragging, as the loads from a pitching bow increase the likelihood of dragging an anchor. Consider the radius of your anchor rode, plus boat length, when you calculate your swinging circle, allowing for changes in wind or current direction, and water depth due to tides. Make sure there are no boats, shoals, rocks, or other objects in that circle. Finally, make sure your anchor works for the particular bottom; the lightweight fluke-style anchor shown here works best in sand or mud; it wouldn't work well on a grassy, rocky, or hard-clay bottom.

  1. Prepare For Anchoring

Before the anchor goes over the bow, make sure you have plenty of rode and that it's free of tangles and ready to run. Anchor rode where length is marked ahead of time helps you determine how much to put out. A length of chain helps weigh the rode down at the anchor for better holding. When you're ready to set, the boat should be motionless, or drifting very slowly astern. Any forward motion will knock the anchor against the boat's stem. This is especially true on boats with a plumb (vertical) bow.

  1. Drop The Hook

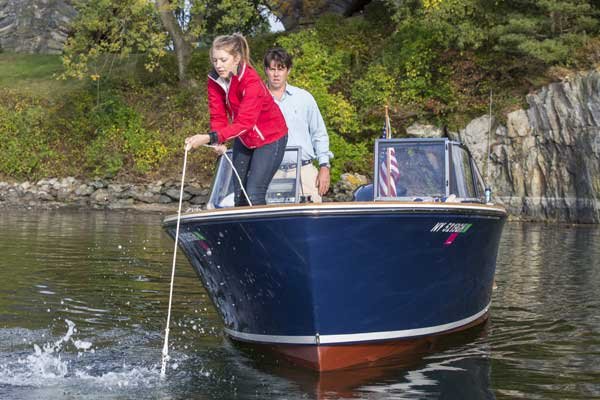
Pick a spot to drop anchor, keeping in mind where you want the boat to end up and that the anchor will drag a short distance before it sets. As the boat drifts back, lower the anchor slowly to the bottom, then gently pay out the rode. This will prevent the chain from piling up in a heap. If the anchor and rode all pay out in one line, free of tangles, everything should be ready to set it securely in the bottom. Take a turn around a cleat and snub it off every now and then to let the tackle straighten out.

    4. Pay Out The Proper Scope

Here's a great way to figure how much anchor rode you are putting out. Most adult arm spans are between five and six feet across, so you can quickly pay out a 5:1 scope by counting the same number of arm spans of anchor rode as the water depth plus your bow height.

Your anchor holds best when the load on it is horizontal, not vertical, so you'll have to let out enough scope to accomplish that. First, add the depth of the water to the height of the bow above the waterline. Now, multiply that total by 5 (for a 5-to-1 scope), and pay out that amount of rode for a "lunch hook" when you'll be aboard in calm conditions. If it's windy, or you might go ashore for a bit, pay out at least a 7-to-1 scope.

If you're anchoring in water 10 feet deep and your bow is 5 feet above the waterline, water depth + bow height = 15 feet, which means that for a lunch hook you should put out 75 feet of rode (15 feet x 5).

For an overnight stop, put out 105 feet (15 feet x 7). When you calculate scope, don't include the chain at the anchor end of the rode unless there's more than 6 feet or so; the chain's job is simply to weigh down the anchor.

  1. Set The Hook

Once you've let out ample scope, let the boat settle back on the anchor to straighten out the rode. A gentle breeze or a mild current may be sufficient for this step. If it's absolutely still, use the engine with just a touch of reverse. Pause and take a good look around, especially abeam; note your position relative to other fixed objects.

Now put the engine in SLOW reverse. You can expect to move slightly astern as the anchor and rode set themselves and stretch out. Soon, though, the boat should settle in a fixed position. (If at this stage the boat is still moving astern, your anchor may be dragging; pick it up and drop it again.) If the boat's position is fixed, you should see prop wash near the stern, and your anchor rode should be straight and taut.

  To thoroughly set the anchor, with the engine still in reverse, increase the rpm. If the boat stays put, you can rest (relatively) easy, knowing you're hooked. Check your swinging room again, assuming that the wind or current might come from any direction. Have some fun.

When it comes time to move on, you'll need to apply a vertical load to your anchor rode to break the anchor free. This means moving gently forward with the engine, and if you don't have a windlass, gathering aboard as much rode as you can by hand.

Beware to keep the rode out of the propeller and rudder, and communicate the position of the rode with the person on the helm if visibility is blocked. Once the rode is directly below the bow of the boat, take a turn on a cleat. Then, signal the helms person to put the engine in SLOW forward. The anchor should break free; if it doesn't, apply a little more throttle.

Once the anchor is free, go back into neutral. Bring the anchor and rode aboard, taking care not to damage the hull, and rinse off any mud. Coil and stow the rode, and you're ready for your next anchorage. 


0

KEEPING YOUR ELECTRONICS FUNCTIONING

Posted On: August 03, 2017


Tips for keeping your marine electronics functioning properly.

With the latest spate of recent boat fires and collisions or near collisions, its' always a good idea to review some basics. (thanks to our friends at Boat Magazine for the excerpts)

Here are some simple benchmarks to verify that your marine electronics are working properly before you leave port, including:

  1. Make a radio check to confirm you are transmitting and receiving properly.
  2. Confirm your position dockside with your GPS. Make a range and bearing check with a known point of reference. Become familiar with how many satellites you normally receive and their relative strengths. This will let you know if your GPS is operating normally.
  3. When leaving port, make sure your autopilot has no difficulty holding a course and responds properly to steering commands.
  4. Check your radar by viewing familiar targets on long and short ranges to make sure they appear normal.

These quick reference checks can verify that your electronics are ready for sea duty, as well as serve as an early warning for possible pending failures.

Another way to avoid electronics failures is with a periodic preventive maintenance inspection, which you can do yourself.

Voltage Loss
Guard against a drop in electrical voltage, which can cause equipment to stop working or limit its performance. Inspect all connections from the battery to your electronics. Be alert for any loose connections, which can over time result from a boat’s normal impacts when underway. Be alert to corrosive buildup on terminals and electrical connections.

Batteries
Check batteries routinely. Buy a multimeter and learn how to use it. This is one of the handiest instruments for finding, correcting and preventing electricity-related problems.

Consult the Manual
Be sure you have a manual for each electronic device you have on board. The troubleshooting section can tell you what to do for each instrument’s most common problems. Don’t have a manual? Most manuals can be downloaded for free from the manufacturer’s website.


0

DON'T FORGET MID SEASON MAINTENANCE

Posted On: August 01, 2017

Midseason Boat Maintenance Tips

Waterproof Canvas
A hot day, right after washing the boat, is the perfect time to rejuvenate the water repellency of your canvas by applying a product like Star brite Waterproofing with PTEF

Mask and Fins
While you’re at the sandbar or rafted with friends, dive overboard and inspect the boat’s bottom. Usually, the transom can stand a scrub to remove fouling, since not much “washing action” occurs there. Ditto for the scum line above the painted waterline. You may also have a layer of slime on your boat’s bottom. The trick is to remove the growth without removing too much bottom paint. We use a scrap of shag carpet with good results. It removes soft growth without scuffing off too much paint.

And while your down there, check out your prop for damage and look for line wound around the shaft growth, like barnacles, use a paint scraper with the corners filed round to prevent gouging.

Lights
Before buying a new fixture, clean the socket and contacts using 220-grit sandpaper wrapped around a stick. You can also purchase replacement sockets. If you do replace the fixture, consider upgrading to energy-saving LED lights

Air-Out
On a dry, windy day, open the hatches, pry off deck plates and let the boat breathe, to reduce moisture and the chance for corrosion and mildew.

Seacocks
Open and close seacocks regularly. Besides an annual disassembly and lubrication, constant use will keep them in shape and will alert you to problems before they become catastrophic.

Zincs
Check your zinc anodes for corrosion. While you may have been in the same slip for years without problems, you never know when your marina’s wiring or your neighbor’s boat has developed an electrical problem. If they have, it’s your problem too. Stray current can eat up underwater metals quickly. So make this check a part of your regular routine.

Lubrication
Lube grease fittings and linkages. Spray engine, fuse blocks and ground buses with products, like Corrosion Block or Boeshield T-9, that dry to a waxy film. Spray lubes that stay wet attract grit, making more of a mess.

0